When to Repot Plants

There are various reasons why you will need to report a plant. Some may simply want to do it for aesthetic reasons, preferring the design of one pot over another. Others are not a matter of choice and will need to be done to better ensure the health of the plant. Even when the plant looks fine above the soil, what happens beneath the substrate can determine the health of a plant. Eventually, this will manifest in problems in the quality of the plant. Transferring to a new pot can allow for more space so the roots can breathe and provide the plant with its necessary nutrients. It can also help a plant to present blooms if it has had trouble flowering.
At thedailyECO, we provide a complete beginner's guide on when to repot plants. In addition to looking at why you would replant a plant, you can find out how to transfer plants to a new pot to best ensure their health and longevity.
When is the time to repot a plant?
When we place any plant in a pot, we should do our best to consider what each species needs. Unless you have grown them from seed, most plants will be sold in temporary plant pots which minimize space when sold at market. It will be a requirement to replant them once they are at home. If you have a garden, they may never need to be repotted.
If you are an expert gardener, you should know what each type of plant needs, but this is not the case for beginners. For this reason, we explain some of the reasons why you need to repot a plant:
- Plant is root bound: when roots start circling the inside of the pot or grow out of the drainage holes, it indicates the plant has outgrown its container. This limits access to nutrients and water, so transplanting it to a new pot will allow it to thrive.
- Depleted soil nutrients: over time, the soil loses its ability to provide essential nutrients. Even if you fertilize regularly, the soil may be too far gone. Repotting refreshes the soil, offering better nutrient availability. You don't necessarily need to change the pot, but you need to replant in new soil.
- Poor drainage: soil can become compacted, leading to waterlogging or poor aeration. If the soil is dense, water may pool in the soil which increases the risk of root rot.
- Poor plant growth: if a previously thriving plant stops growing despite proper care, it could be due to the limitations of its pot. Old soil may also be a contributing factor.
- Instability: a plant that has outgrown its pot may become top-heavy, causing it to tip over. This is especially common with plants that have tall or spreading growth habits.
- Mineral build-up: white crusts on the soil surface or around the rim of the pot suggest salt or mineral accumulation, something which can harm roots. Repotting replaces the contaminated soil and allows the plant to thrive.
- Disease or pest infestations: soil-borne pests, fungus or diseases may require repotting with new, sterile soil to protect the plant and prevent further damage.
- Aesthetic reasons: as we have mentioned in the introduction, you may simply want to repot a plant because you want a different design. Perhaps you are redecorating or you simply found a new pot which you want to put on display, so repotting can help cement your new aesthetic.
- Root rot: one of the most common health issues affecting potted plants, root rot can make roots unhealthy and function poorly. Repotting is necessary to remove damaged roots and replace the soil.
- Outgrowing its space: climbing plants or trailing vines may need a larger pot to contain their growth. Similarly, some tree species may need a new pot to accommodate its growth outside the pot itself.
It is also important to consider preventive repotting to ensure some of the above problems do not develop in the first place. We should know what we can about each species with plant by looking at plant care guides. We may not need to repot if we find the right pot in the first place. This does not take into consideration factors such as soil degradation over time.
Considering the growing season can also help to avoid problems down the line. Repotting a plant during this time can negatively effect its growth, so you should research the specific growth cycle of each species. Similarly, you may not want to do it during a particularly cold season since this might also affect growth.
The frequency with which repotting should be done varies depending on the growth rate of the plant in question. Many plants need to be repotted every year, but some slower-growing plants may need up to 2 or 3 years to require a new repot.

How to repot a plant (step-by-step guide)
If any of the above have resulted in the need to repot a plant, our beginner's guide will help you to make this process easy:
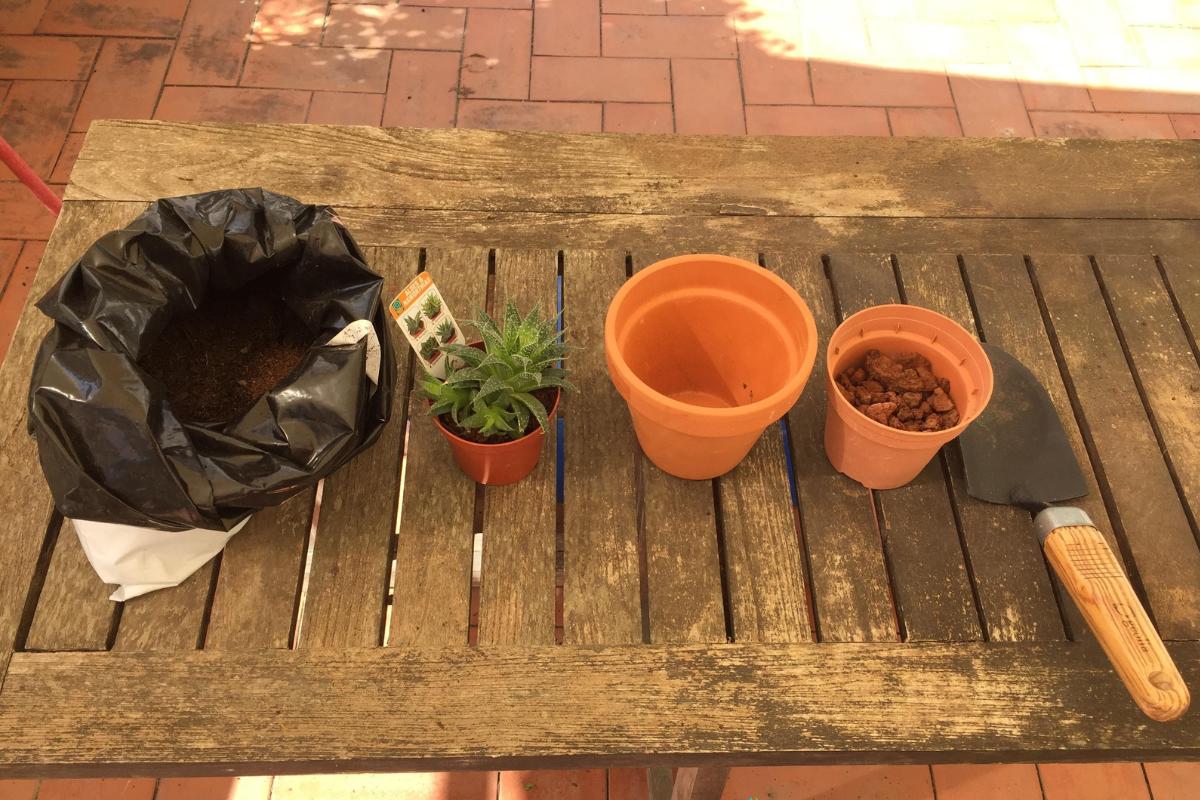
- Prepare your tools: preparing your gardening tools properly will help to make the replanting more efficient, as well as avoiding the spread of disease. Sterilized pruning shears and trowel will help prevent the plant from suffering from wounds that can become infected. If you are transplanting thorny species such as a rose bush or a cactus, you will need gardening gloves or thick leather gloves to avoid getting hurt by the thorns.
- Health check: before removing the plant from its pot or location, it is advisable to do a general sanitation check. Look at its leaves and stems and remove any that are dry or in poor condition. Since the plant will be weakened by moving it, removing any damaged or diseased parts before doing so can give it a better start in its new home.
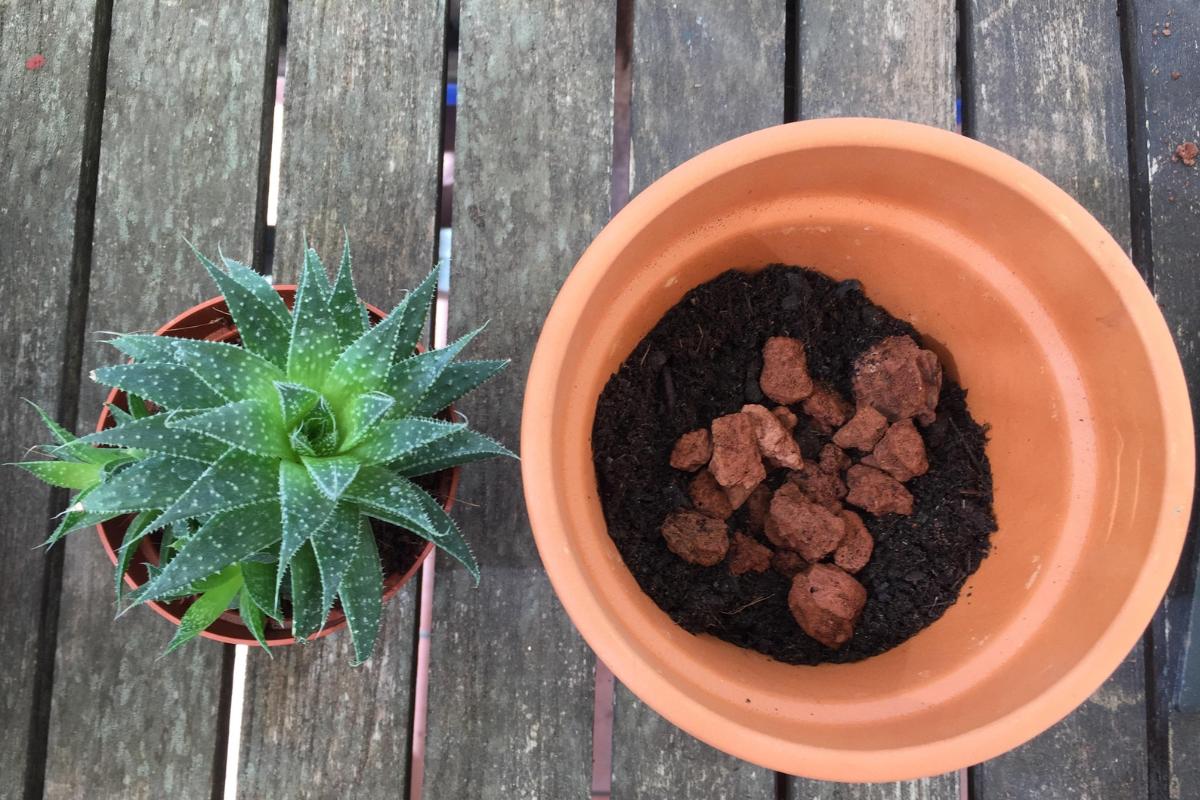
- Choose the pot for your plant: unless for aesthetic reasons, it should always be larger than the previous and it should be prepared with a suitable substrate. If the pot does not have drainage holes, it is advisable to leave a few inches of coarse gravel at its base.
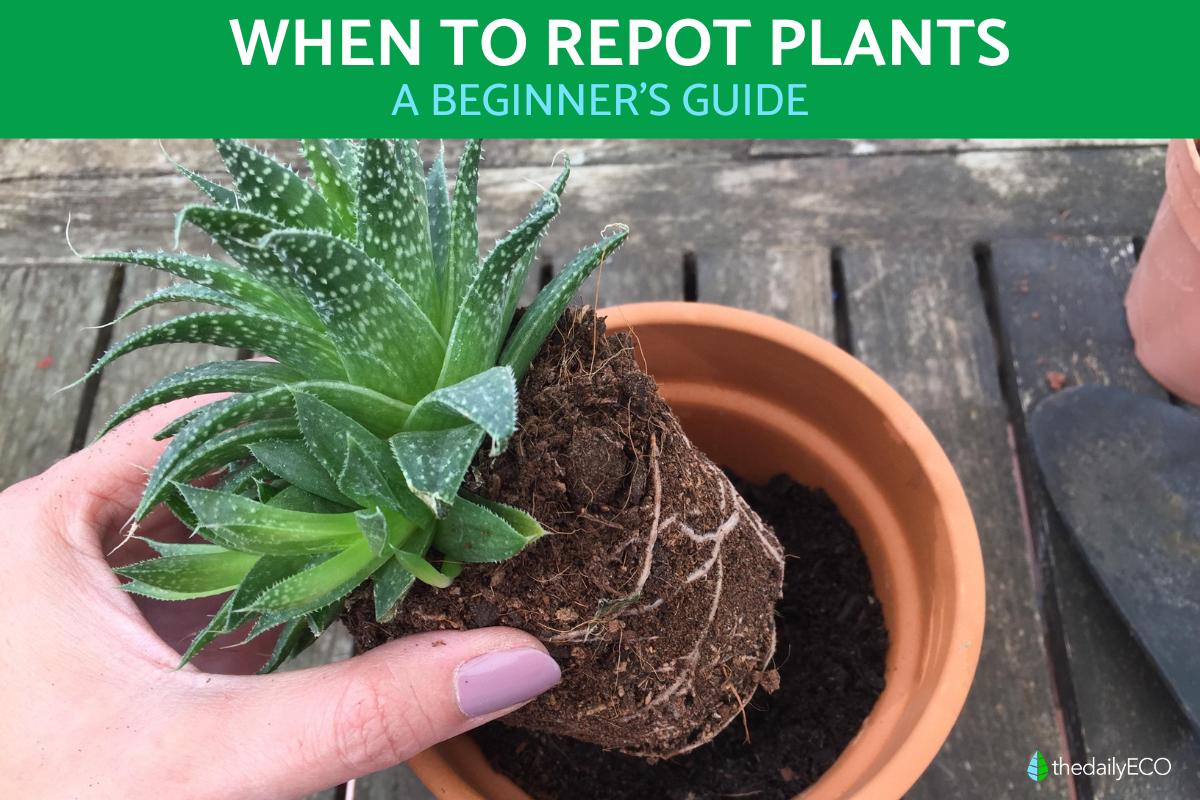
- Remove the plant: if the plant has outgrown its pot, you may have difficulty removing it. You can help by turning the pot and gently tapping its sides. You may even be able to turn it upside down and carefully tap the edge to release it, always making sure the plant does not fall to the ground. If it is outdoors, dig around the pot to remove the root ball, leaving some distance between the pot and the plant. You may need to cut off some roots if they are damaged.
- Loosen the roots: take the root ball and shake it a little if the roots are very tangled or compacted. If it was in a pot that was too small, the roots will probably maintain the shape of the pot. Take advantage of the opportunity to clean them of any traces of soil and untangle them. This will help the plant to better absorb nutrients in its new space.
- Place the plant in its new location: cover it with substrate until its roots are completely buried. Water it now to moisten the soil and give the plant the hydration it needs. Leave it for two or three days in a bright area that does not receive direct sunlight. After this adaptation period, you can put the plant in its new permanent location.
Learn more about root care with our article explaining what is root pruning?

Some tips on successfully repotting a plant
It is advisable to water the plant a few hours before transplanting it, but you should avoid waterlogging the soil. Just moisten the soil. This will help the soil to be softer and the root ball to come out more easily.
After transplanting to a new pot, you should carefully monitor the plant's response to its new environment. If it shows signs of weakness or deterioration, look for the cause. Sudden changes in humidity, change in the type of substrate or a different amount of light can be fatal for many species.
If a plant's roots are sticking out of the drainage holes in its pot, it's a sign that the pot has become too small and it's time to repot it. In the case of orchids, which have aerial roots, you'll know that the pot is too small when too many of the roots stick out of the container.
Ensuring you have the right substrate is essential when repotting a plant. If you do not use the right type, it can make all your preparations pointless. You can learn more with our articles on what is universal soil and how to make worm castings at home.

If you want to read similar articles to When to Repot Plants, we recommend you visit our Plant care and cultivation category.


